
So you just got yourself a brand new Nespresso Mini and you’re eager to make your first perfect cup of espresso. But hold on a sec, as exciting as it is, we understand that you might be a little unsure about how to get started. Well, fret not! In this article, we’ll walk you through the simple step-by-step process of using your Nespresso Mini. From setting it up to selecting the right capsule, we’ve got you covered. So grab your Mini and let’s dive right in!


Unboxing and Setup
Unboxing the Nespresso Mini
When you first receive your Nespresso Mini, the excitement of unboxing it is unparalleled. Open up the package and gently remove the Nespresso Mini from its protective casing. Take a moment to admire its sleek design and compact size. The Nespresso Mini is designed to fit perfectly into any kitchen or office space, allowing you to enjoy a delicious cup of espresso wherever you are.
Identifying the components
Before you start assembling the machine, make sure you familiarize yourself with all the components that come with the Nespresso Mini. These include the main unit, water reservoir, detachable drip tray, used capsule container, cup support, and power cord. Take your time to inspect each component and ensure that everything is in pristine condition.
Assembling the machine
Now that you have identified all the components, it’s time to assemble your Nespresso Mini. Start by attaching the water reservoir to the back of the machine. Make sure it clicks into place securely. Next, place the detachable drip tray at the bottom of the machine to catch any excess liquid. Finally, attach the cup support to the front of the machine, ensuring that it is stable and level.
Preparing the power cord
Before plugging in your Nespresso Mini, it’s essential to prepare the power cord properly. Make sure the cord is free of any knots or tangles. Gently unwind it and ensure that there are no damages or frayed wires. Once you have inspected the power cord and are satisfied with its condition, plug it into a suitable power outlet. Congratulations! You have successfully completed the setup process.

Water Reservoir and Espresso Preparation
Filling the water reservoir
To start brewing your favorite espresso, you need to fill the water reservoir of your Nespresso Mini. Lift the lid of the water reservoir and remove it from the machine. Use cold and fresh water to fill the reservoir to the desired level, making sure not to exceed the maximum capacity indicated. Place the filled water reservoir back into the machine, ensuring that it fits snugly.
Selecting the desired cup size
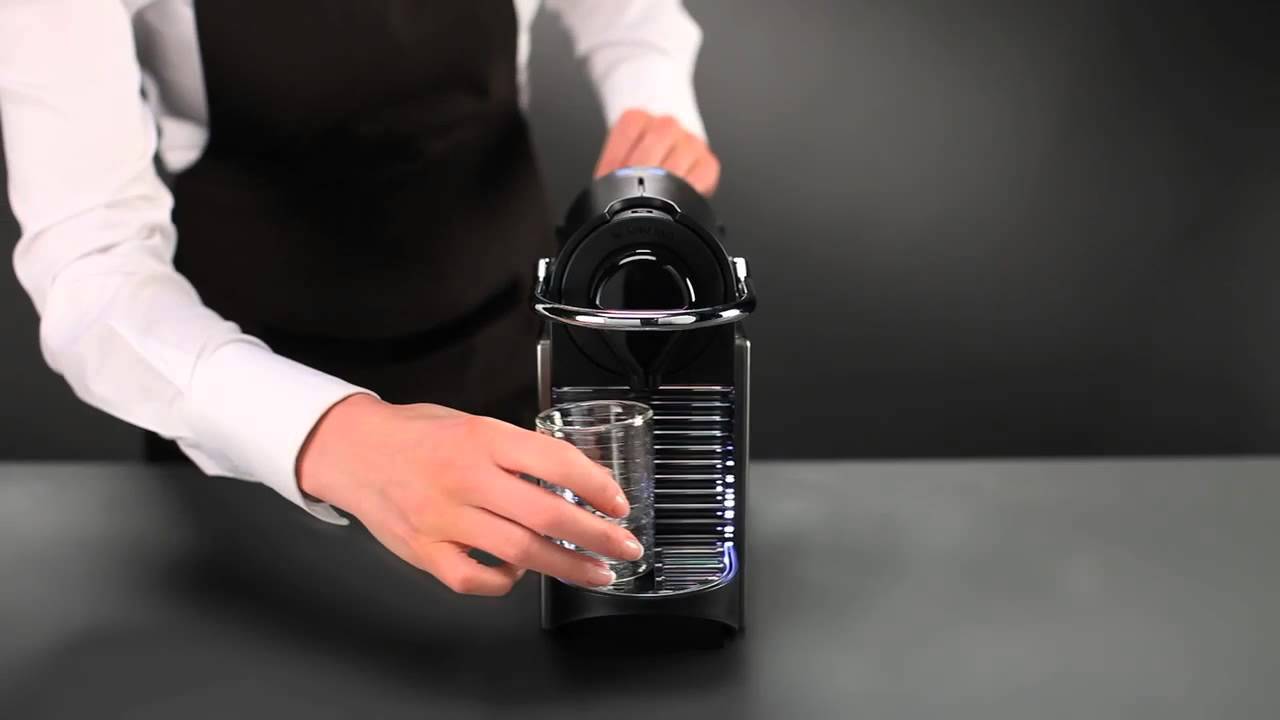
The Nespresso Mini offers the flexibility to choose between different cup sizes, allowing you to customize your espresso experience. To select your desired cup size, locate the cup size selector on the top of the machine. Slide it to the left for an Espresso (1.35 oz) or to the right for a Lungo (5 oz). Choose the cup size that suits your preference and get ready to enjoy a perfect cup of espresso.
Inserting a coffee capsule
With the water reservoir filled and the cup size selected, it’s time to insert a coffee capsule into your Nespresso Mini. Lift the lever on the front of the machine to open the capsule compartment. Place a compatible Nespresso coffee capsule into the compartment, ensuring that it is fully inserted. Lower the lever to close the compartment, piercing the capsule and preparing it for brewing.
Adjusting the cup support
To accommodate different cup sizes and prevent splashes or spills, you can adjust the cup support on your Nespresso Mini. Simply slide the cup support up or down to match the height of your cup. This customization feature ensures that your espresso is dispensed directly into your cup, maintaining its rich flavor and crema.
Initiating the brewing process
With everything set up, it’s time to initiate the brewing process. Press the desired button on the top of the machine, corresponding to the cup size you have selected. The Nespresso Mini will start brewing your espresso, delivering a perfectly extracted and aromatic cup of coffee. Sit back, relax, and savor the delightful flavors that the Nespresso Mini brings to your palette.
Programming and Customization
Accessing the programming mode
The Nespresso Mini allows you to personalize your espresso experience by accessing the programming mode. To enter the programming mode, press and hold the button of your desired cup size while turning on the machine. Keep holding the button until the lights start blinking. You are now ready to customize your Nespresso Mini according to your preferences.
Setting the water volume
Once you are in the programming mode, you can easily set the water volume for each cup size. To adjust the water volume, simply press and hold the button for the desired cup size until the desired volume is reached. Release the button, and the Nespresso Mini will remember your personalized water volume for future use.
Adjusting temperature and strength
In addition to water volume, you can also adjust the temperature and strength of your espresso. While in the programming mode, press and hold the button for the desired cup size again. This time, wait for the lights to start blinking rapidly. You can then release the button and press it again to cycle through the available temperature and strength settings. Once you have selected your preferred settings, simply wait for the lights to stop blinking, indicating that your changes have been saved.
Enabling or disabling energy-saving mode
To minimize energy consumption, the Nespresso Mini features an energy-saving mode. By default, this mode is enabled, but you have the option to disable it if desired. While in the programming mode, press and hold the button for the desired cup size once again. Wait for the lights to blink rapidly, then release the button and press it again to toggle the energy-saving mode on or off. This feature provides you with control over the power usage of your Nespresso Mini.
Maintenance and Cleaning
Emptying the used capsule container
After enjoying your espresso, it’s essential to empty the used capsule container of your Nespresso Mini. Open the lever on the front of the machine to access the capsule compartment. Carefully remove the used capsule from the compartment and dispose of it properly. Make sure to empty the capsule container regularly to maintain optimal performance and prevent any blockages.
Cleaning the drip tray
The drip tray of your Nespresso Mini collects any liquid or drips that may occur during the brewing process. Regularly cleaning the drip tray prevents any build-up and maintains the visual appeal of your machine. Remove the drip tray from the machine and dispose of any liquid collected. Clean the tray with warm, soapy water, rinse it thoroughly, and let it dry before placing it back into the machine.
Descaling the Nespresso Mini
Over time, mineral deposits from water can accumulate in your Nespresso Mini, affecting its performance and the taste of your espresso. Descaling the machine is crucial to remove these impurities and ensure that your coffee retains its flavors. Follow the instructions provided in the descaling kit specifically designed for Nespresso machines. It is recommended to descale your Nespresso Mini every 3-6 months, depending on the frequency of use and the hardness of your water.
Cleaning the external surfaces
To keep your Nespresso Mini looking pristine, it’s important to clean its external surfaces regularly. Use a soft, damp cloth to wipe down the machine, removing any coffee stains, dust, or residue. Avoid using abrasive or harsh cleaning products, as they may damage the machine’s surface or affect its functionality. Take care of your Nespresso Mini, and it will continue to provide you with delicious espresso for years to come.

Troubleshooting
Machine not turning on
If your Nespresso Mini does not turn on, there may be a simple solution. First, ensure that the power cord is securely plugged into a functional power outlet. Check that the power switch on the machine is turned on. If the machine still does not turn on, try unplugging it, waiting for a few seconds, and then plugging it back in. If the issue persists, it’s best to contact Nespresso customer support for further assistance.
No coffee flow
If you encounter a lack of coffee flow during the brewing process, there may be a blockage in the machine. Start by checking if the water reservoir is properly filled and correctly seated. Make sure the coffee capsule is inserted correctly and that the lever is fully closed. If the issue persists, the machine may need descaling or further troubleshooting. Refer to the user manual or contact Nespresso customer support for guidance.
Leaking or dripping
A leaking or dripping Nespresso Mini can be a frustrating issue to deal with. First, check that the drip tray and used capsule container are correctly in place and not overflowing. Examine all the connections and ensure that everything is tightened securely. If the problem continues, it may indicate a more significant issue, such as a malfunctioning seal or valve. In such cases, it is advisable to contact Nespresso customer support for assistance.
Unusual noises
While some operational noise is expected from any coffee machine, unusual or loud noises may indicate an underlying issue. If you notice any unfamiliar sounds coming from your Nespresso Mini, it’s important to investigate the source. Check for loose components, such as the water reservoir or cup support. If the noises persist or are accompanied by other performance issues, reach out to Nespresso customer support for further guidance.
Safety and Precautions
Proper handling of the power cord
When using the power cord of your Nespresso Mini, always handle it with care. Avoid bending or twisting the cord excessively, as it may damage the wires inside. Ensure that the power cord is not in contact with hot surfaces or sharp objects. When unplugging the machine, pull the plug directly from the power outlet instead of tugging on the cord. By following these precautions, you can ensure the longevity and safety of your Nespresso Mini.
Avoiding contact with hot surfaces
The Nespresso Mini, like any coffee machine, becomes hot during the brewing process. To prevent burns or accidents, avoid touching the hot surfaces of the machine. Use the designated handles and buttons when operating the machine. Allow the Nespresso Mini to cool down before cleaning or performing any maintenance tasks. Always prioritize your safety and take caution when handling any hot appliances.
Cleaning with unplugged machine
To prevent any electric shocks or accidents, always clean your Nespresso Mini when it is unplugged from the power source. Do not attempt to clean or rinse the machine while it is still connected to electricity. This precaution ensures that you can clean the machine thoroughly without risking any mishaps. Take the time to disconnect your Nespresso Mini from the power outlet before engaging in any cleaning activities.
Keeping out of reach of children
As with any kitchen appliance, it is important to keep your Nespresso Mini out of the reach of children. The machine contains hot components and liquids that can cause harm if mishandled. Store the machine in a secure location, preferably in a higher or locked cabinet. Educate your children about the potential dangers of interacting with kitchen appliances and emphasize the importance of safety.

Frequently Asked Questions
Can I use other brands’ coffee capsules?
No, the Nespresso Mini is designed specifically to work with Nespresso coffee capsules. Other brands’ capsules may not fit properly or may cause damage to the machine. It is recommended to use only Nespresso capsules to ensure the best performance and results.
How often should I descale the machine?
The frequency of descaling your Nespresso Mini primarily depends on the hardness of your water and the frequency of use. Generally, it is recommended to descale the machine every 3-6 months. However, if you notice any signs of limescale build-up, such as slow water flow or altered coffee taste, it is advisable to descale the machine promptly.
What should I do if the coffee tastes weak?
If your coffee tastes weak or watery, there are a few possible reasons. Start by checking if the water reservoir is properly filled to the desired level. Ensure that the coffee capsule is fresh, as stale capsules may result in a weaker flavor. You can also try adjusting the water volume or strength settings to suit your taste preferences. If the issue persists, you may want to contact Nespresso customer support for further guidance.
Is it normal for the machine to vibrate during use?
Yes, it is normal for the Nespresso Mini to vibrate slightly during the brewing process. The vibration is caused by the pressure of the water passing through the coffee capsule. However, if you notice excessive or unusual vibrations accompanied by noise or performance issues, it is recommended to reach out to Nespresso customer support for further assistance.
Customer Support and Warranty
Nespresso Customer Support contact information
For any inquiries or assistance regarding your Nespresso Mini, you can contact Nespresso Customer Support through their toll-free hotline at [insert phone number] or visit their official website at [insert website URL]. The Nespresso Customer Support team is dedicated to providing exceptional service and support to ensure that you have the best Nespresso experience.
Registering the Nespresso Mini for warranty
To safeguard your Nespresso Mini and take advantage of the warranty coverage, it is essential to register your machine. The registration process is simple and can be done online. Visit the Nespresso website or follow the instructions provided in the warranty card included with your machine. Registering your Nespresso Mini ensures that you receive the necessary support and protection throughout the warranty period.
Checking the warranty period
To verify the warranty period for your Nespresso Mini, refer to the warranty card included in the packaging. The warranty period may vary depending on your geographical location and local regulations. It is important to understand the terms and conditions of the warranty to ensure that you receive the appropriate coverage and support for your machine.
Understanding warranty coverage
The warranty coverage for your Nespresso Mini provides protection against manufacturing defects and malfunctions. It typically includes repair or replacement of parts and labor, depending on the nature of the issue. However, it is important to familiarize yourself with the specific terms and conditions outlined in the warranty documentation provided with your machine. Understanding the warranty coverage allows you to make informed decisions and seek assistance when needed.

Alternatives and Upgrades
Exploring other Nespresso machine models
If you are considering alternatives or upgrades to your Nespresso Mini, there are plenty of other Nespresso machine models to explore. Each model offers unique features and functionalities that cater to different preferences and needs. Take the time to research and compare the various options available to find the perfect Nespresso machine that suits your coffee preferences and lifestyle.
Comparing features and functionalities
When comparing different Nespresso machine models, it’s crucial to consider the features and functionalities that are most important to you. Some models may offer additional brewing options, such as milk frothing or multiple cup sizes. Others may come with advanced customization settings or connectivity options. Take into account your specific coffee preferences and requirements to ensure that you choose a Nespresso machine that fulfills all your expectations.
Considering the Nespresso Mini Plus
The Nespresso Mini Plus is an upgraded version of the original Nespresso Mini, offering enhanced features and capabilities. It includes additional cup sizes, a larger water reservoir, and an improved descaling alert system. If you are a fan of the original Nespresso Mini but desire more options and convenience, the Nespresso Mini Plus may be the perfect upgrade for you.
Exploring compatible accessories
To further enhance your Nespresso Mini experience, consider exploring and investing in compatible accessories. Accessories such as milk frothers, capsule storage containers, and travel cases can maximize your enjoyment and convenience. Whether you prefer a frothy cappuccino or need a stylish case to bring your Nespresso Mini on-the-go, the right accessories can elevate your coffee ritual.
Conclusion
Congratulations on mastering the use of your Nespresso Mini! By following the unboxing and setup process, understanding the water reservoir and espresso preparation, exploring the programming and customization options, and learning proper maintenance and troubleshooting techniques, you are well-equipped to enjoy the convenience and versatility of this exceptional coffee machine.
With the Nespresso Mini, you can indulge in coffeehouse-quality espresso right in the comfort of your own home or office. Its compact size, intuitive design, and customizable features make it the perfect companion for coffee lovers on the go. By taking proper care of your Nespresso Mini and seeking support from Nespresso Customer Support when needed, you can ensure years of delightful espresso experiences.
So go ahead, brew your favorite cup of espresso and savor the flavors that the Nespresso Mini brings to your mornings or afternoons. Appreciate the convenience and versatility it offers, allowing you to enjoy a personalized coffee experience with just the touch of a button. The Nespresso Mini truly brings the coffeehouse experience to your countertop, ensuring the perfect cup of espresso every time. Cheers to endless moments of blissful coffee enjoyment!